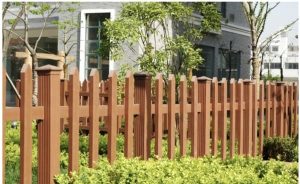
External cladding indicates any material that provides shade to your exterior walls. There are various types of materials used for cladding and different installation systems are used for them. But the basic installation steps are the same.
Unifloor is a composite external cladding manufacturer and supplier in China, providing you with high-quality composite exterior wall cladding. We use the safest and easiest installation methods. This article will introduce you to the basic steps of exterior siding installation. It will help you to complete the installation easily.
Tools you need
Gloves
Jig Saw
Hand Drill
Chalk Line
Spirit Level
Safety Mask
Circular Saw
Impact Driver
Tape Measure
Safety Glasses
Power Mitre Saw
Carpentry Square
Hearing Protection
How many materials do you need?
Before ordering materials, you will need to take some measurements and plan your project.
1. Measure the area of the wall panel to be installed. The height and width of each wall.
2. Decide whether to install the external cladding horizontally or vertically depending on the shape of the building.
3. If installing horizontally, divide the height of the wall by the width of the wall panels and the resulting number is the number of wall panels needed.
4. Presently increase the width of the wall by the number of boards high and afterward partition this number by the length of the cladding board. This article will provide you with the complete number of boards required.
5. If you plan to install wall boards on multiple walls, follow this procedure to calculate the number of boards required for all walls.
6. It is recommended that you add approximately 5% extra material for waste.
7. If you have problems with the calculation or are not sure if the results are accurate, you can contact us for help.
Step-by-step installation guide
Step 1 Install the substructure
Fix the slats to the wall with screws and make sure the distance between adjacent slats does not exceed 600 mm.
Step 2 Install the first wall panel

Mark the horizontal line and make sure that the wall panel on the bottom layer is at least 20 mm above the ground.
Attach fasteners to the slats and secure the bottom wall panel to the slats by pre-drilling. (If installing vertically, the first panel is placed in place)
Step 3 Install the second wall panel
After securing the first wall panel, install the hidden fasteners, place the next wall panel in place, and repeat this process. Check that each wall panel is level before fixing it.
Step 4
Once installed around the windows and doors, cut your wall panels to get a perfect fit.
Step 5
When installing to the top, cut the wall panel to the desired size and secure to the slats by pre-drilling.
Step 6 Install the corner trims

Corner trims, also made of wood plastic composite, are installed to cover and trim the edges. Corner trims are also applied to corners such as window edges.
Important Notes
In addition to the above basic step-by-step instructions, here are some other important things you should know.
Make sure you use a breathable waterproof membrane or waterproof membrane on the exterior walls.
Make sure to leave proper clearance at butt joints to allow for expansion.
Install wallboard on all wall edges, such as windows and doors edges.
Use a straight board to guide the circular saw when trimming the top edge of the wallboard to size. This will result in a crisper, smoother edge.
Conclusion
The installation of wood plastic composite exterior wall panels is easy to handle, if you have any needs or questions, you can contact us via online customer service or email.


